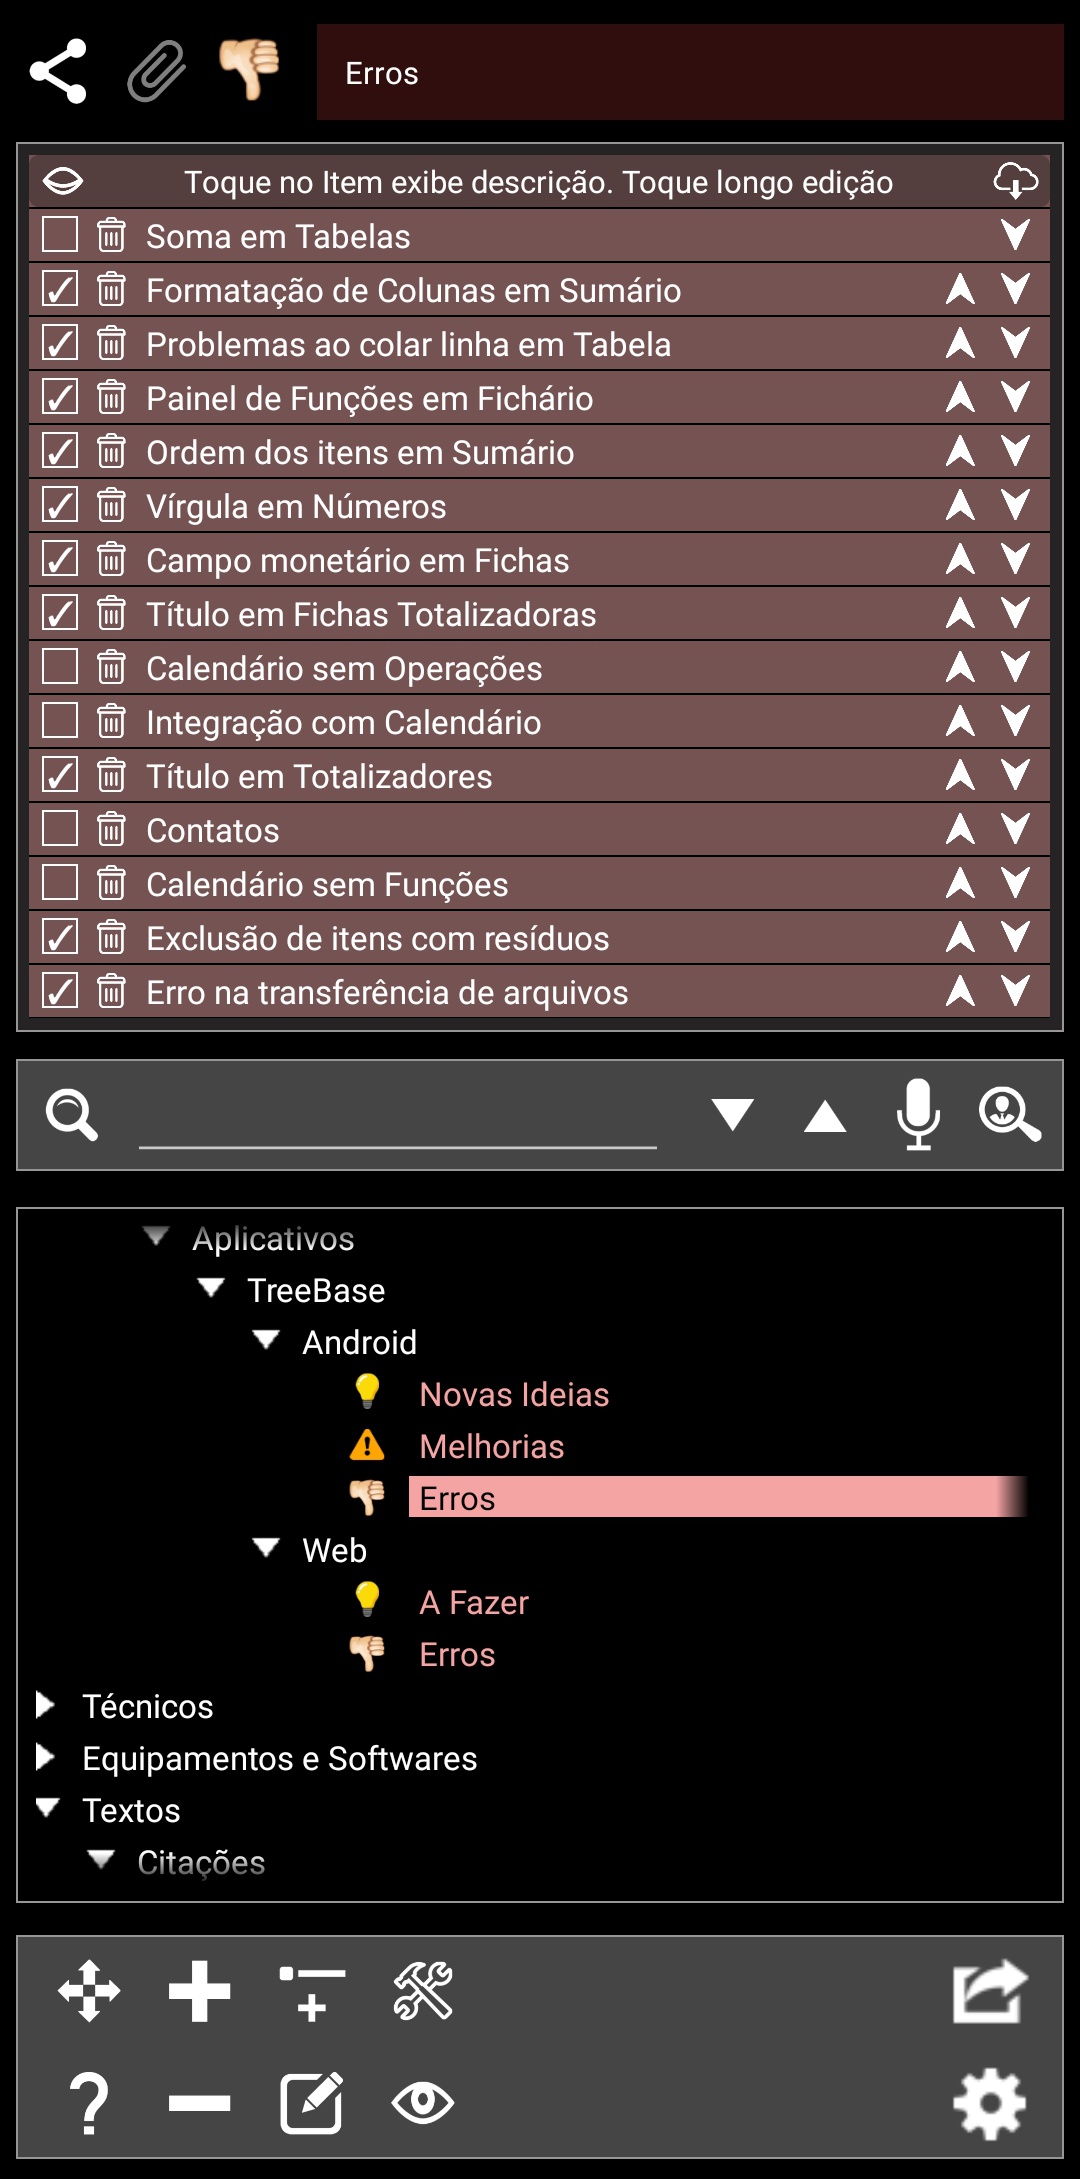
List
 In the list item, practically all operations are restricted to the content area. In the list itself, you can perform all actions, except inserting a new item in the list, which remains at the bottom of the screen as in other types of items.
In the list you need to tap the insert function located on the bottom panel to add a new item. From then on, all operations are performed on the list itself.
Each element in the list has a box that you can check or uncheck to indicate something you want. Next to the checkbox, there is a trash icon. It will serve to eliminate the element.
To the right of each element there are up and down arrows that serve to move the element through the list, changing the order.
To edit the information of the elements, just give them a long press.
When editing list elements, there are two pieces of information that can be used: The element title and the description. This description is not visible at first, being displayed when you have a short press on the element.
As in the case of the table, any operation performed on the list item is immediately updated in the database, with no possibility of reversal.
In the header of the list, there is a button on the left with the drawing of an eye, which, when used, can change to open or closed. It makes the already marked elements appear or not in lists. This configuration is not individual per list, it is reflected in all lists and remains as configured even in other application executions.
On the right of the header, there is a button that has the function of importing data sent from a PC through the Cloud (https://treebasecloud.af-studio.online) and inserting them in the current list, along with the existing items.
Depending on how the application is configured, an element that is already marked may be unavailable for editing. You can modify this at any time in the TreeBase settings.